Tweaking & Customizing
How presets are a starting point and how to adjust them for your photos.
Presets Are Starting Points
The most important thing to understand about presets, whether from Hyperfocal or anywhere else, is that they're designed to be starting points, not final edits. A preset that looks perfect on one photo may need adjustment on another due to differences in lighting, exposure, white balance, and subject matter.
The Professional Approach
Professional photographers rarely apply a preset and call it done. They use presets to establish a baseline look, then fine-tune each image. This workflow saves time while ensuring every photo looks its best.
Common Adjustments After Applying a Preset
After applying a preset, these are the most common tweaks you'll make:
Exposure
If your photo is darker or brighter than the sample image the preset was designed for, you'll need to adjust exposure. This is the most common adjustment. Simply slide exposure up or down until the image looks right.
White Balance
Presets often include white balance adjustments, but your photo's lighting may differ. If colors look too warm or too cool after applying the preset, tweak the temperature slider while maintaining the preset's color grading intent.
Highlights & Shadows
Different photos have different dynamic ranges. If highlights are blown out or shadows are too dark after applying a preset, adjust these sliders to recover detail while keeping the preset's overall tonal character.
The Adjustment Workflow
Here's a recommended workflow for tweaking presets:
- Apply the preset: Start with your Hyperfocal preset
- Fix exposure first: Get the overall brightness right
- Adjust white balance if needed: Correct any color cast issues
- Recover highlights/shadows: Ensure detail isn't lost
- Fine-tune contrast: Adjust to match your photo's characteristics
- Tweak individual colors: If specific colors need attention
Adjusting for Different Lighting
The same preset may need different adjustments based on lighting:
Golden Hour Photos
May need reduced warmth if preset adds more warmth; watch for blown highlights in the sky
Midday/Harsh Light
Often needs shadow recovery and highlight reduction; may benefit from less contrast
Overcast/Flat Light
May need increased contrast and vibrance; watch white balance for blue color casts
Indoor/Artificial Light
Often needs significant white balance correction; watch for mixed lighting color issues
Saving Your Adjustments
If you find yourself making the same adjustments repeatedly, consider saving a modified version:
In Lightroom Classic
- Apply your preset and make your adjustments
- Click the + next to Presets
- Select "Create Preset"
- Choose which settings to include
- Name it (e.g., "Golden Hour: Indoor Version")
- Save to your Hyperfocal folder
In Hyperfocal
Use the Variations feature to create modified versions for different scenarios directly in Hyperfocal. Describe the adjustment you need: "same look but for indoor lighting" or "version with more contrast."
Understanding Preset Parameters
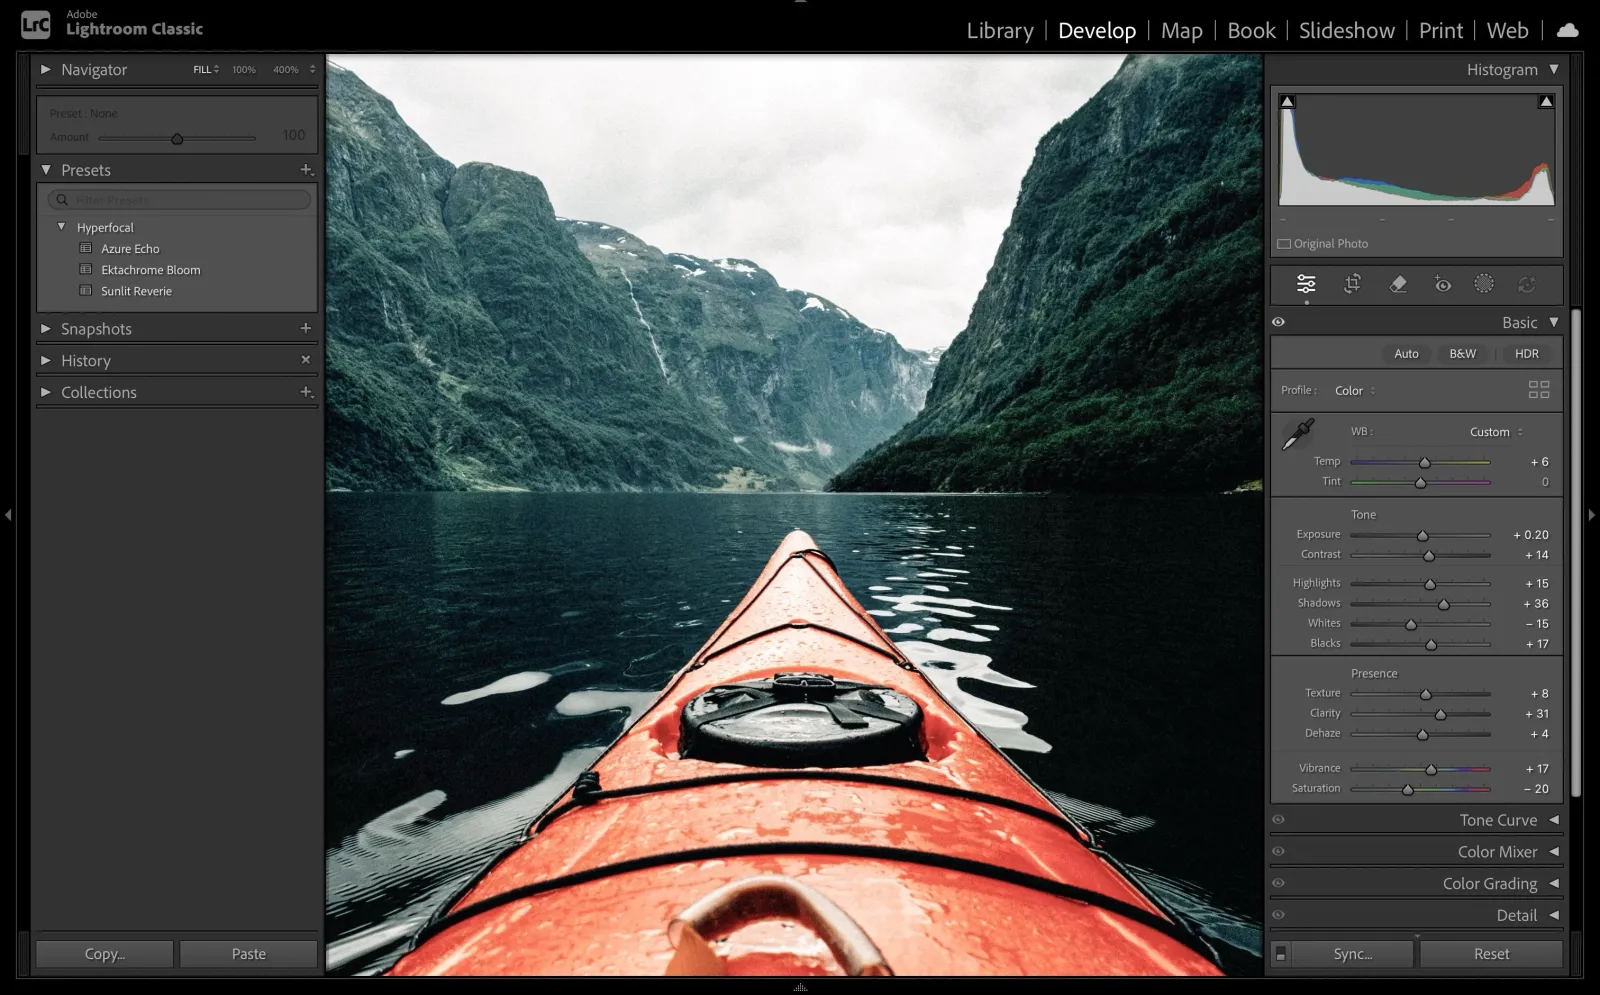
Knowing what each slider does helps you make better adjustments:
- Exposure: Overall brightness of the entire image
- Contrast: Difference between light and dark areas
- Highlights: Brightness of the brightest areas
- Shadows: Brightness of the darkest areas
- Whites/Blacks: Sets the white and black points
- Clarity: Midtone contrast (texture/punch)
- Vibrance: Saturation of muted colors (skin-tone safe)
- Saturation: Intensity of all colors equally
When Presets Don't Work
Sometimes a preset just isn't right for a particular photo. Signs it's time to try a different preset:
- You're adjusting almost every slider significantly
- The color grading fights with colors in your photo
- The mood is fundamentally wrong for the image
- You can't recover important detail in highlights or shadows
In these cases, try a different preset or generate a new one specifically for that type of image.
Related Guides
- Getting Started: Create your first preset
- Remixing & Variations: Create versions for different scenarios
- Writing Effective Prompts: Generate better-matched presets
- Installing in Lightroom Classic: Where to make adjustments