Exporting LUTs
Export your presets as LUTs for video editing and other applications.
What Are LUTs?
LUT stands for Look-Up Table. It's a file that maps input colors to output colors, allowing you to apply consistent color grading across different applications. While presets (XMP files) only work in Lightroom and Photoshop ACR, LUTs work in virtually any video editing software, making them essential for creators who work with both photo and video.
Paid Plan Required
LUT export is included with all paid plans. Check your plan details to learn more.
How to Export a LUT
- Navigate to any preset in your library
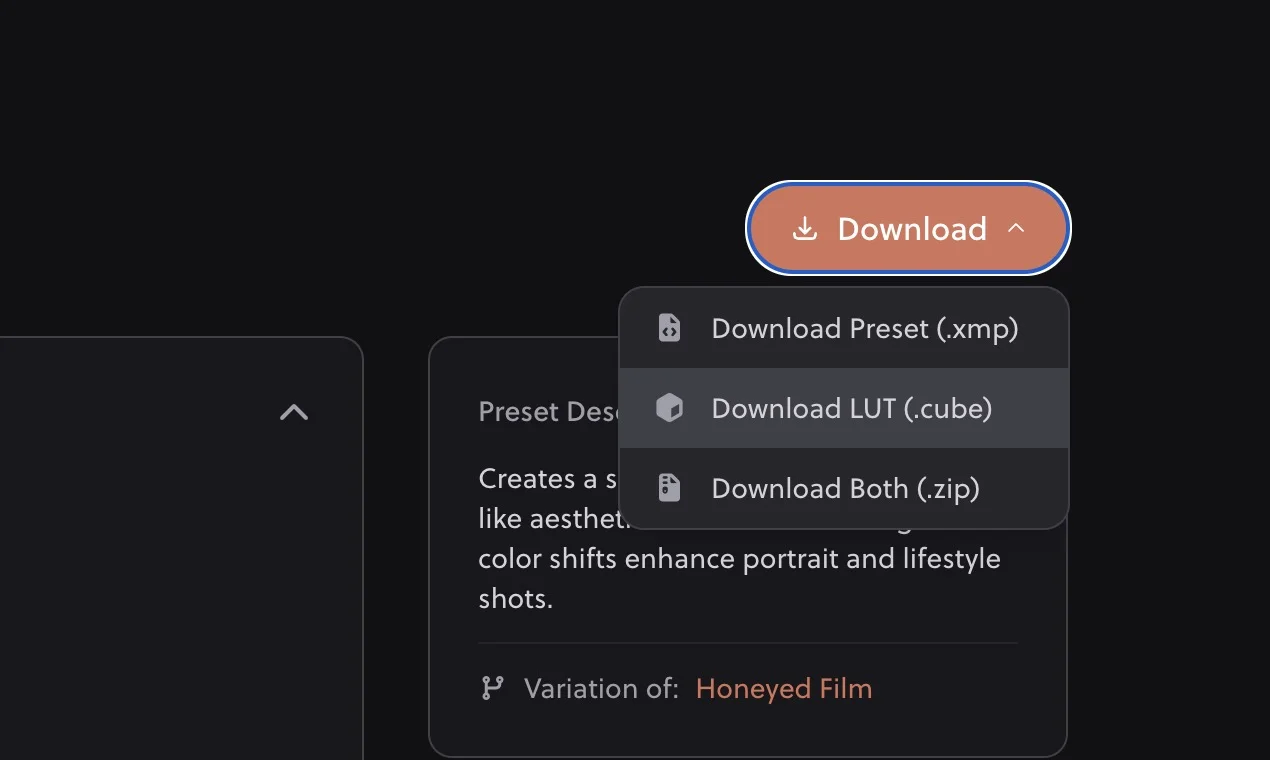
- Click the download button or menu
- Select "Download LUT" or "Download Both"
- The LUT will download as a
.cubefile
LUT Format
Hyperfocal exports LUTs in the .cube format, which is the industry standard supported by:
- DaVinci Resolve
- Adobe Premiere Pro
- Final Cut Pro
- After Effects
- Filmora
- And virtually every other video editing application
Using LUTs in Video Editors
DaVinci Resolve
- Go to the Color page
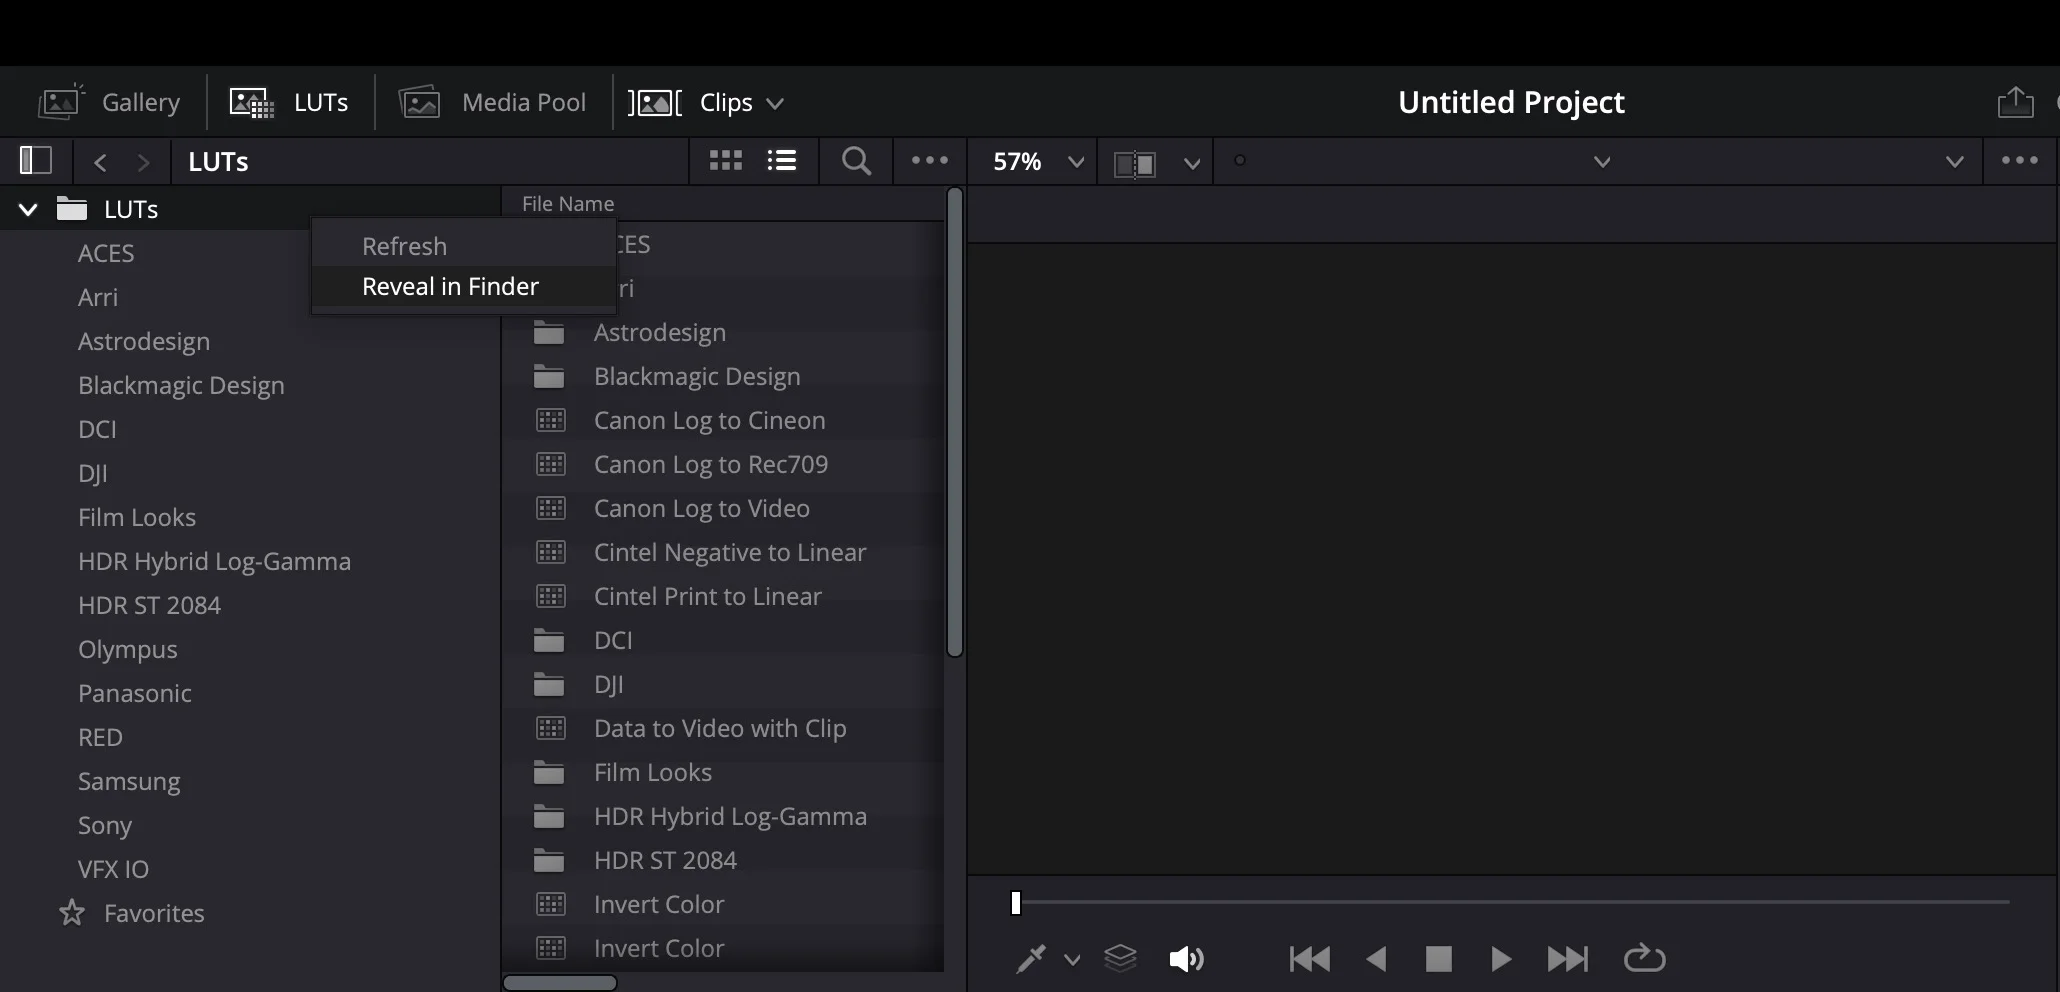
- Open the LUTs panel (if not visible, go to Workspace → Show Panel → LUTs)
- Right-click in the LUTs panel and select "Open File Location" (or "Reveal in Finder" on Mac)
- Copy your .cube file to this folder
- Right-click the LUTs panel and select "Refresh"
- Right-click your LUT and select "Apply LUT to Current Node" or drag it onto a node
Adobe Premiere Pro
- Select your clip in the timeline
- Open the Lumetri Color panel
- Go to the Creative section
- Click the Look dropdown and select "Browse..."
- Navigate to and select your .cube file
Final Cut Pro
- Select your clip in the timeline
- Open the Inspector and go to the Color tab
- At the bottom, click the dropdown and choose "Add Custom LUT..."
- Navigate to and select your .cube file
What Translates to LUTs
Not all Lightroom adjustments can be converted to LUTs. LUTs only handle color transformations, so the following settings will not be included:
- Sharpening & Noise Reduction: These are pixel-level adjustments, not color transforms
- Lens Corrections: Distortion, vignette removal, chromatic aberration fixes
- Grain: Film grain effects cannot be baked into a LUT
- Local Adjustments: Masks, gradients, and brushes are not supported
- Geometry: Crop, rotation, perspective corrections
Color adjustments like exposure, contrast, tone curve, HSL, color grading, and split toning will be included in the LUT.
LUTs vs. Presets: Key Differences
| Feature | Presets (XMP) | LUTs (.cube) |
|---|---|---|
| Works in | Lightroom, Photoshop ACR | Video editors, photo apps, games |
| Adjustable after applying | Yes, every slider | Limited (intensity only) |
| Local adjustments | Supported | Not supported |
| Best for | Photo editing | Video color grading |
Tips for Using LUTs
- Expose correctly first: LUTs work best on properly exposed footage. Correct exposure before applying the LUT.
- Use adjustment layers: Apply LUTs to adjustment layers so you can easily reduce intensity or toggle on/off.
- Adjust intensity: Most editors let you reduce LUT intensity (opacity) if the effect is too strong.
- Match your photo work: Use the same preset's LUT on video to maintain consistent aesthetics across your photo and video content.
Consistent Look Across Photo & Video
One of the biggest benefits of Hyperfocal's LUT export is maintaining a consistent visual identity. Create your signature look as a preset, use it on photos in Lightroom, and apply the same look's LUT to your videos. This is invaluable for content creators, brands, and anyone wanting cohesive aesthetics across all their visual content.
Related Guides
- Managing Your Presets: Find and download your presets
- Plans & Pricing: Check LUT feature availability
- Tweaking & Customizing: Refine your look before exporting
- How Hyperfocal Works: Understand what goes into your presets