Install in Photoshop ACR
Using your presets in Adobe Camera Raw within Photoshop.
About Adobe Camera Raw
Adobe Camera Raw (ACR) is Photoshop's RAW file processor. It uses the same engine as Lightroom, which means Hyperfocal presets work perfectly in ACR. This is great for photographers who prefer Photoshop's workflow but want access to Lightroom-style presets.
Shared Preset Location
Adobe Camera Raw and Lightroom Classic share the same presets folder. If you've already installed a preset in Lightroom Classic, it will automatically appear in ACR too!
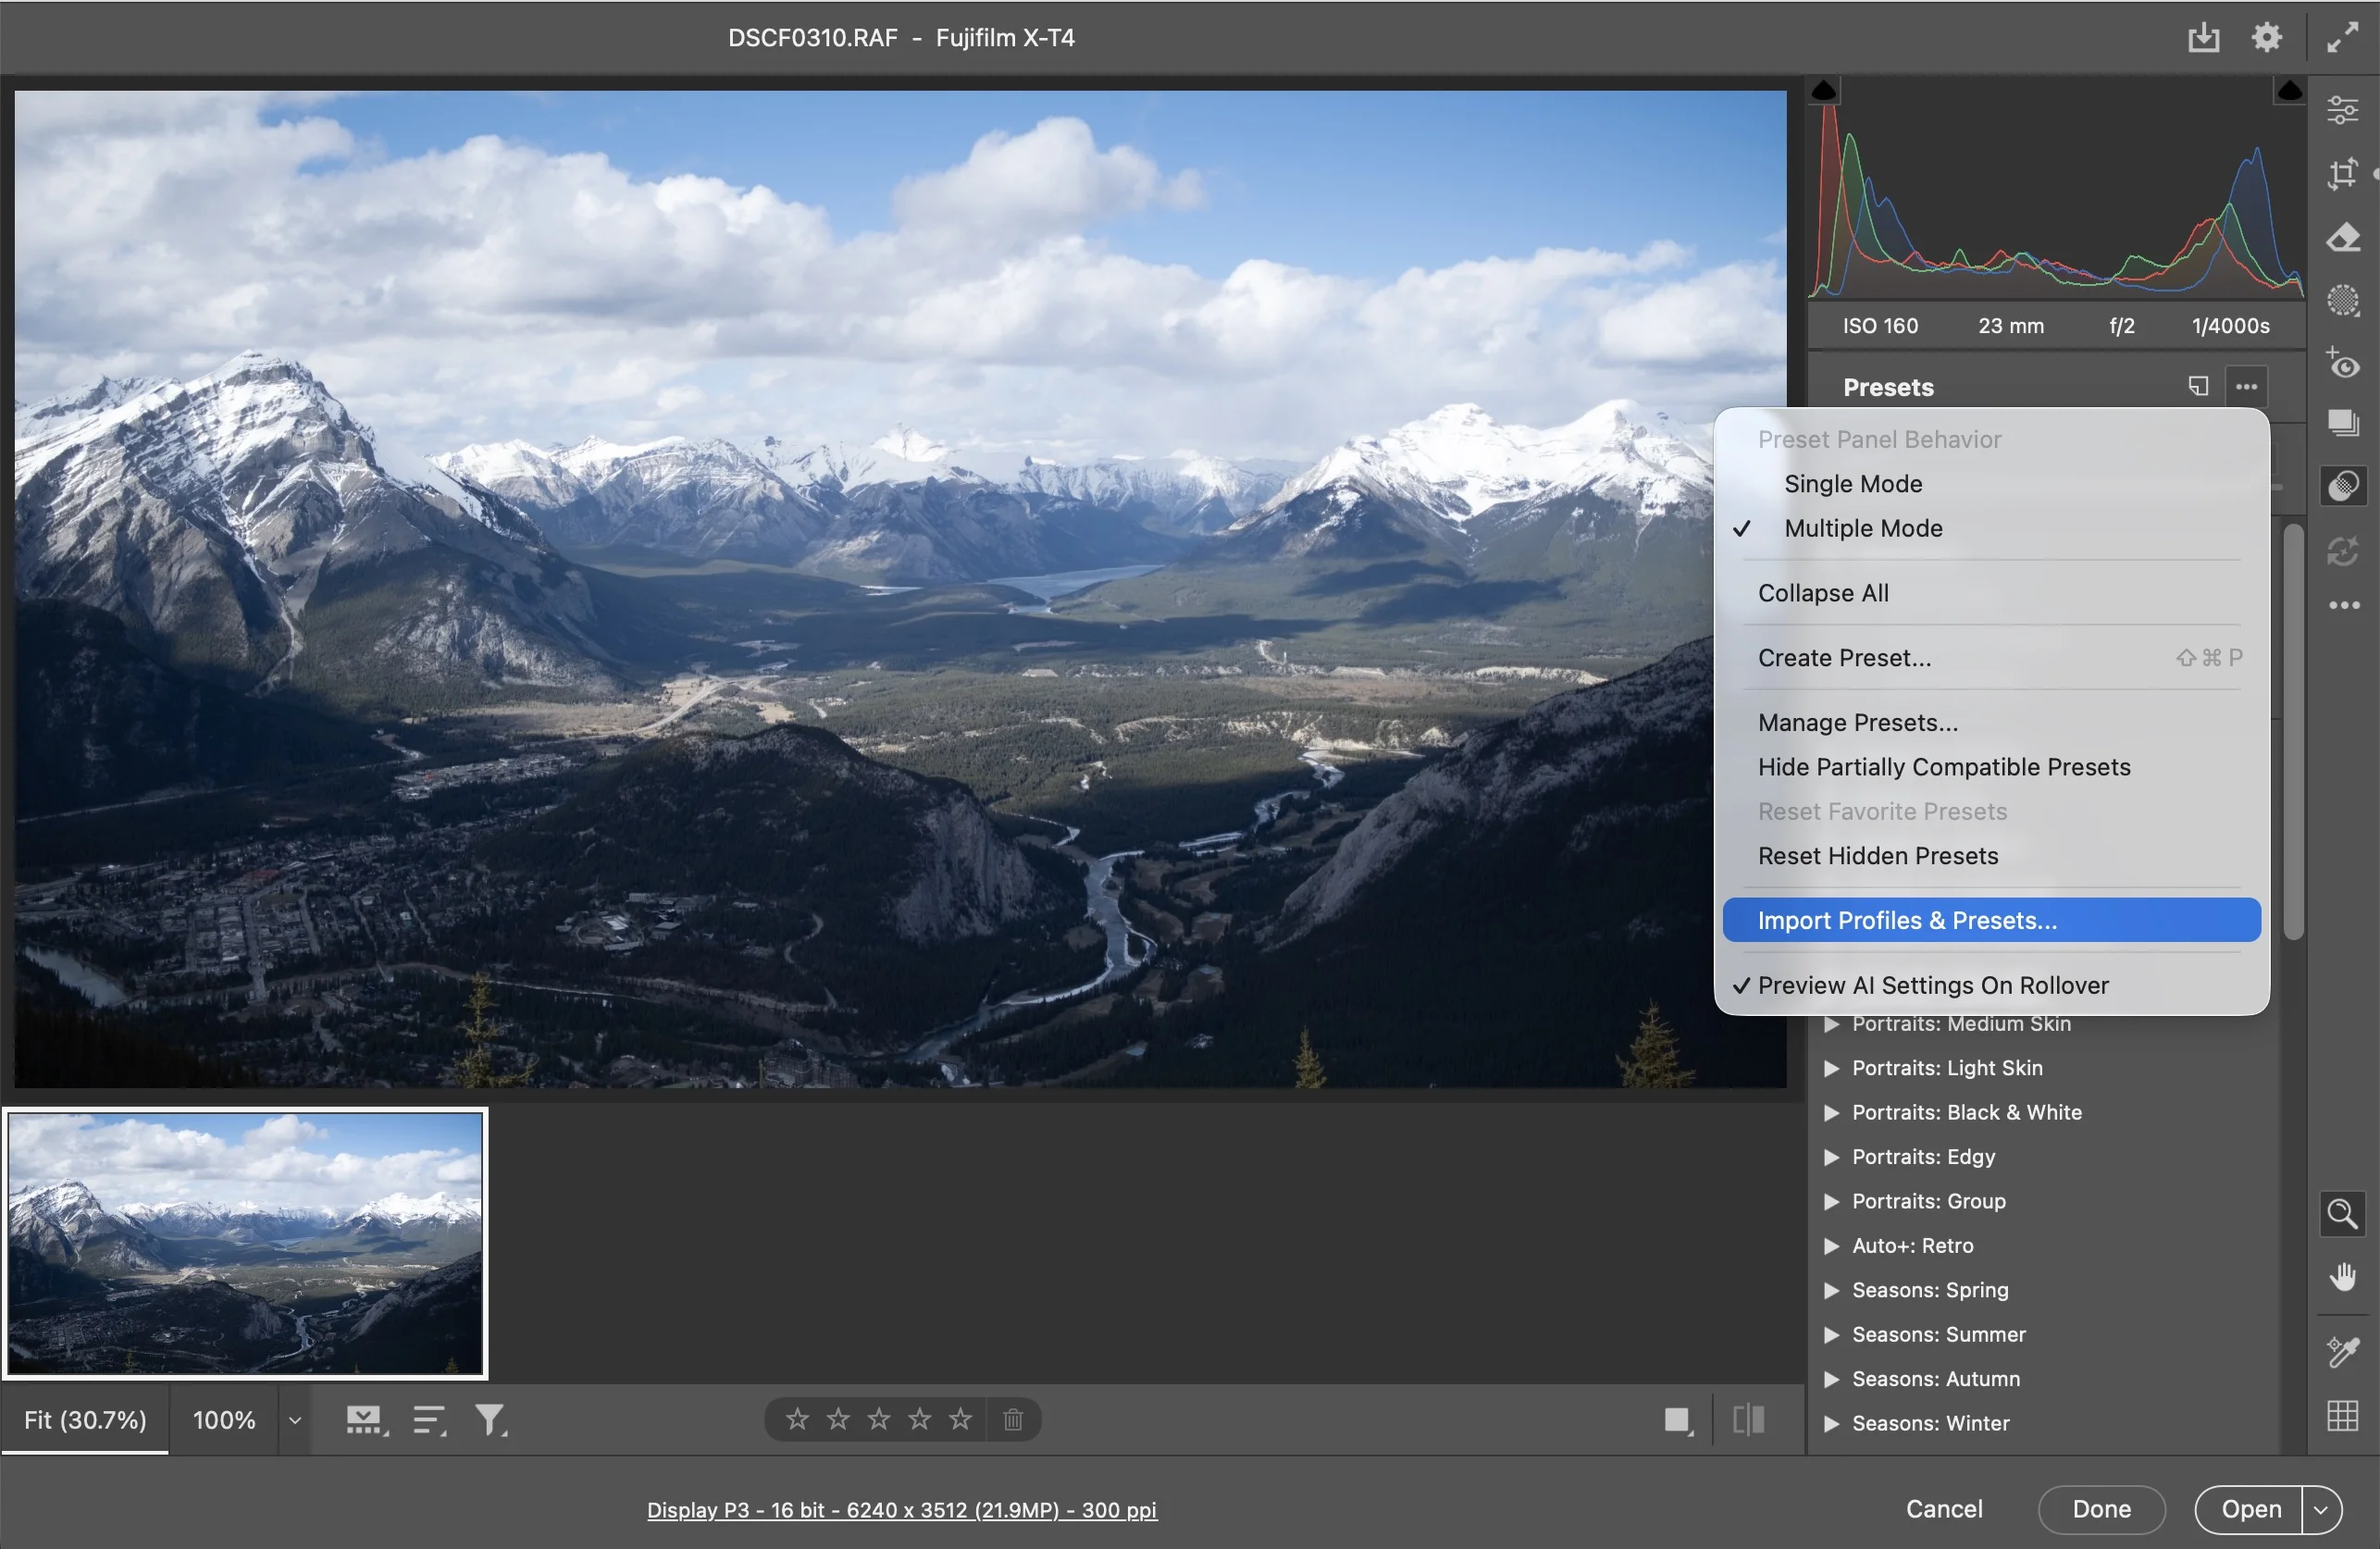
Import via the Presets Panel
- Open a RAW file in Photoshop (ACR will launch automatically), or open any image (JPG, PNG, etc.) and go to Filter → Camera Raw Filter
- In the right panel, click the Presets icon (looks like overlapping circles)
- Click the three dots menu (...) at the top of the panel
- Select "Import Profiles and Presets..."
- Navigate to your downloaded XMP file and click Import
Opening Camera Raw
There are several ways to access Camera Raw in Photoshop:
- RAW files: Automatically opens in ACR when you open a RAW file
- Filter menu: With any image open, go to Filter → Camera Raw Filter
- Keyboard shortcut: Press
Cmd/Ctrl + Shift + Ato open the Camera Raw Filter
Using ACR as a Smart Filter
For non-destructive editing, you can apply Camera Raw as a Smart Filter:
- Convert your layer to a Smart Object (Layer → Smart Objects → Convert to Smart Object)
- Go to Filter → Camera Raw Filter
- Apply your preset and adjust settings
- Click OK; the filter appears under your layer and can be edited anytime
Pro Tip: Smart Filters
Using Camera Raw as a Smart Filter lets you go back and modify the preset settings at any time. Double-click the filter in the Layers panel to reopen Camera Raw with all your settings intact.
Troubleshooting
Camera Raw Filter greyed out?
The Camera Raw Filter requires an 8-bit or 16-bit RGB image. If you're working with a different color mode, go to Image → Mode and switch to RGB Color with 8 or 16 bits.
Related Guides
- Installing in Lightroom Classic: Presets sync between ACR and Classic
- Installing in Lightroom CC: For cloud-based editing
- Tweaking & Customizing Presets: Fine-tune for your photos
- Exporting LUTs: Use your look in video projects