Install in Lightroom CC
How to import presets into Adobe Lightroom CC (cloud-based) on desktop and mobile.
About Lightroom CC
Lightroom CC (also called Lightroom, without "Classic") is Adobe's cloud-based photo editing app. It syncs your photos and presets across desktop, web, and mobile devices. Presets you import on desktop will automatically appear on your phone and tablet.
Lightroom CC vs Lightroom Classic
Not sure which version you have? Lightroom CC has a simpler, darker interface and syncs to the cloud. Lightroom Classic has a more traditional interface with modules (Library, Develop, etc.). If you have Classic, see our Lightroom Classic guide.
Installing on Desktop (Mac/Windows)
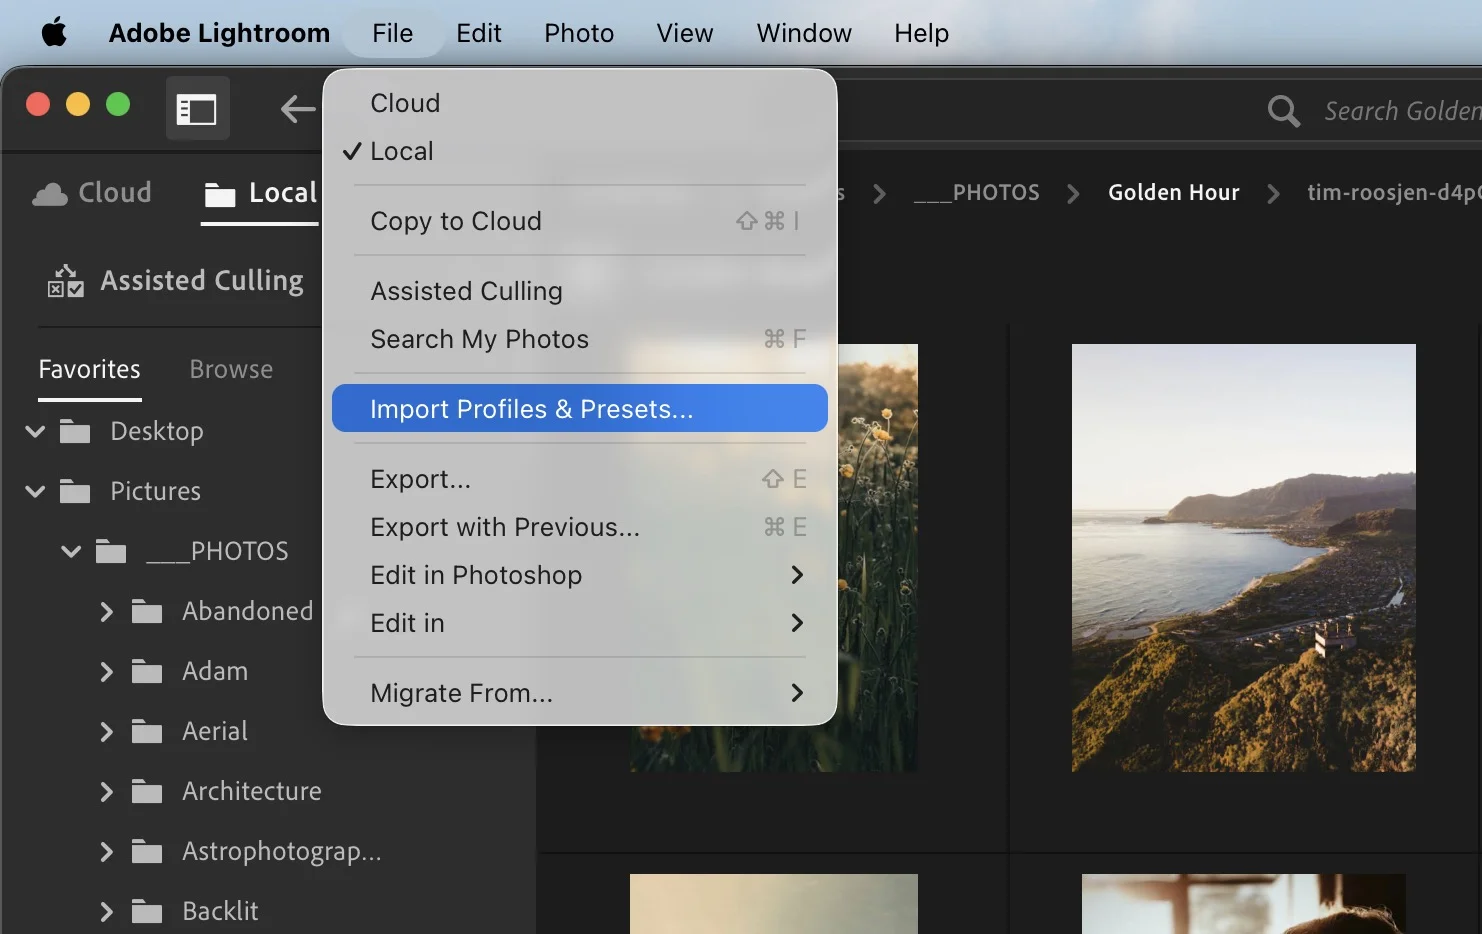
- Open Lightroom on your computer
- Click File in the menu bar
- Select "Import Profiles & Presets..."
- Navigate to your downloaded XMP file
- Select the file and click Import
Alternatively, you can import presets via the ... menu in the Presets panel:
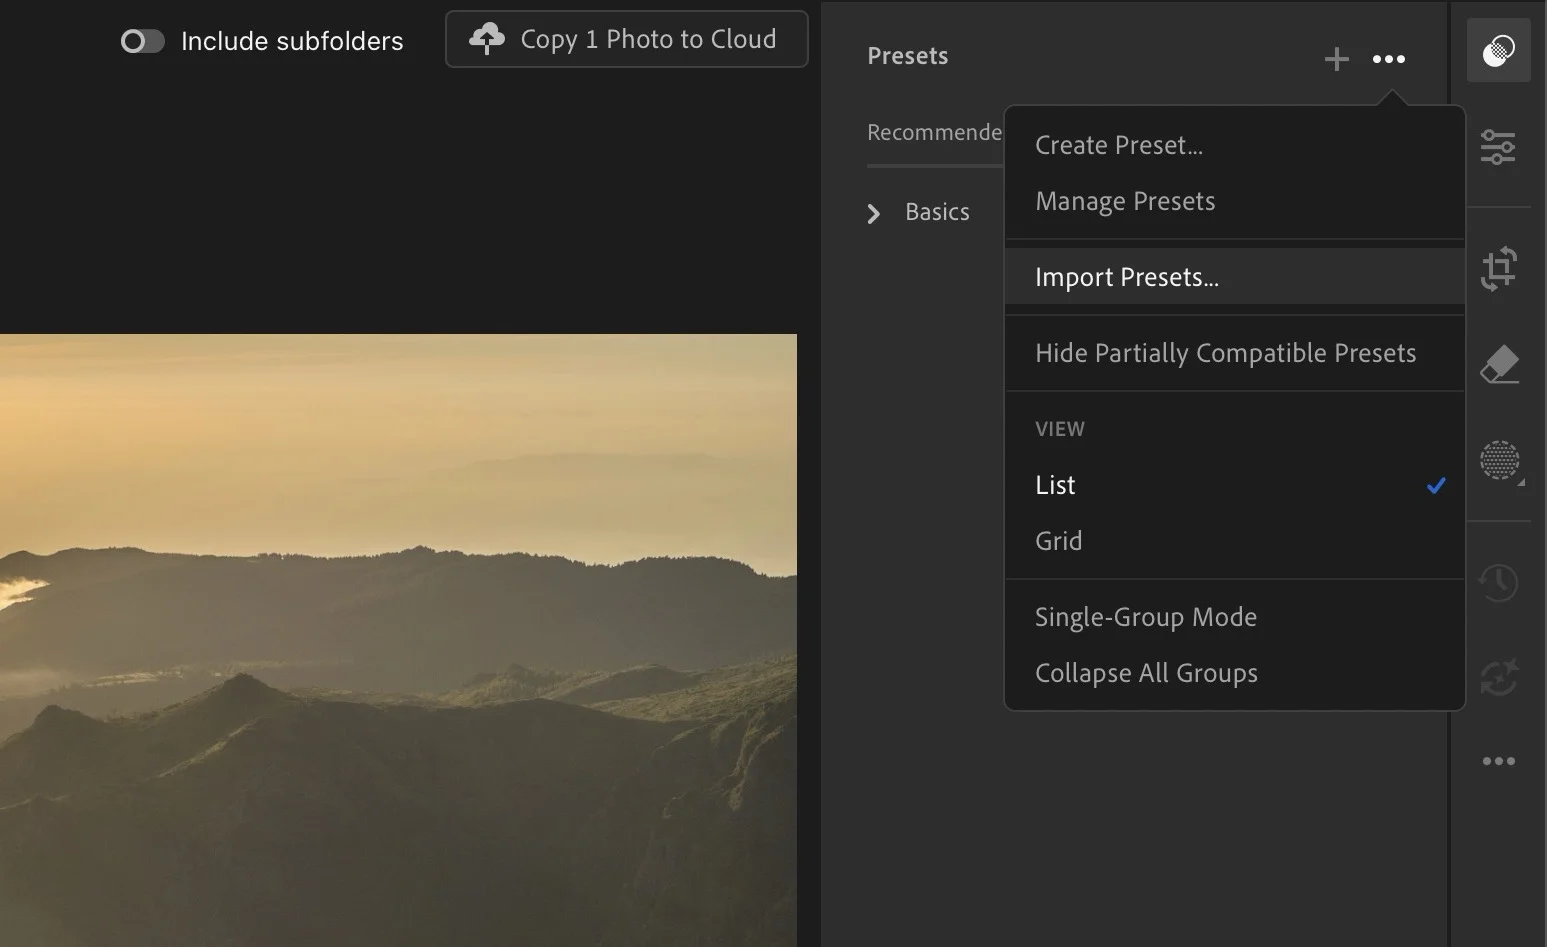
Your preset will appear in the Presets panel under the "Hyperfocal" folder.
Installing on Mobile (iOS/Android)
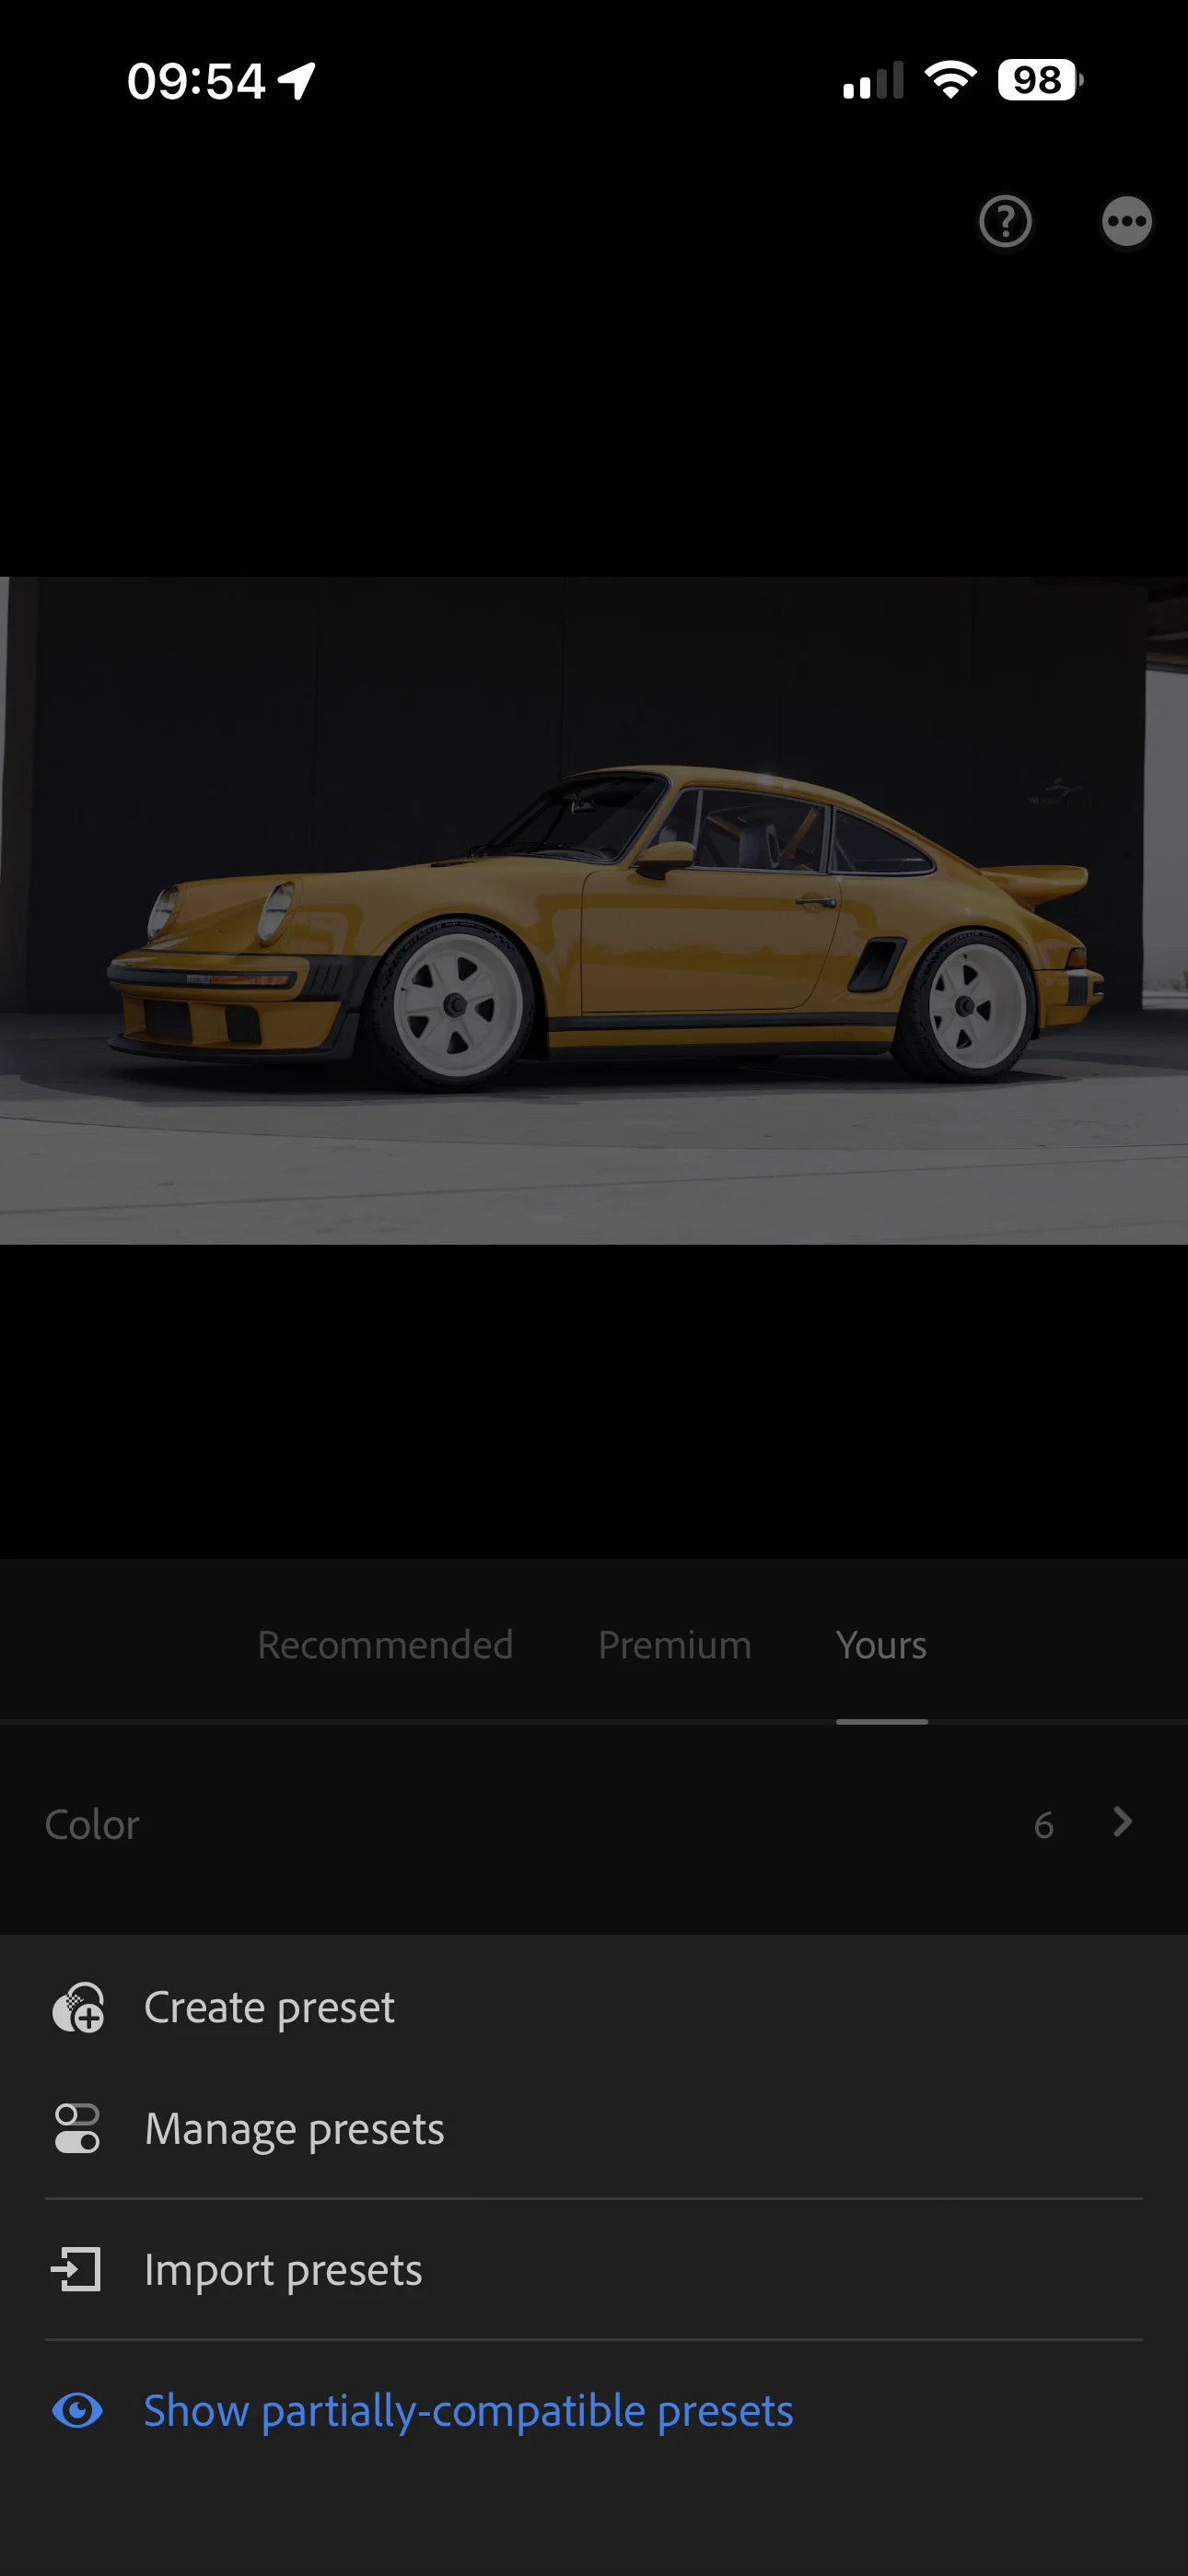
You can import presets directly into the Lightroom mobile app:
- Download the XMP file to your device
- Open Lightroom and go to the Presets panel
- Tap the ... icon in the top right
- Select "Import Presets"
- Navigate to your downloaded file and import it
Cloud Sync
Presets imported on any device will automatically sync across all your devices via Adobe Creative Cloud.
Installing via Lightroom Web
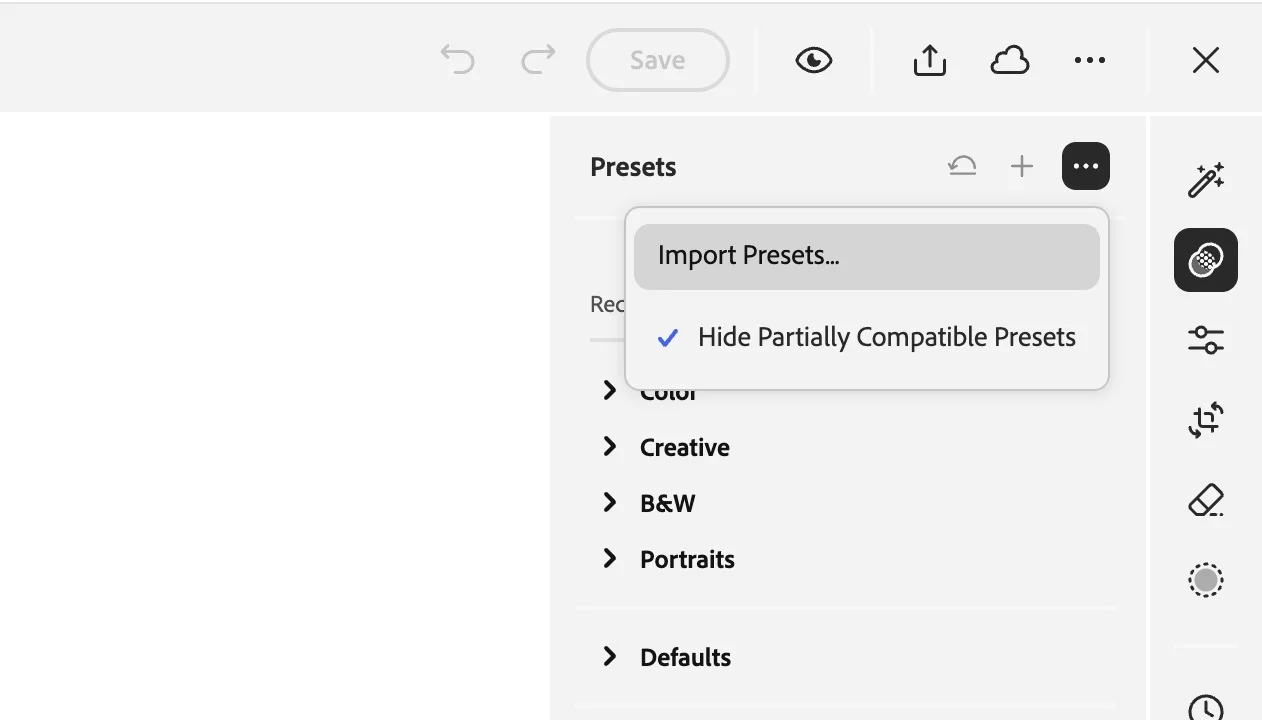
You can also import presets through the web interface:
- Go to lightroom.adobe.com
- Sign in with your Adobe ID
- Open any photo in Edit mode
- Click the Presets icon in the right panel
- Click the three dots menu (...) and select "Import Presets"
- Upload your XMP file
Applying Presets
On Desktop:
- Select a photo
- Click the Presets icon or press
Shift+Pto open the Presets panel - Find your preset in the "Hyperfocal" folder and click to apply
On Mobile:
- Open a photo
- Swipe through the tools at the bottom to find Presets
- Browse your presets and tap to apply
- Tap the checkmark to confirm
Syncing Across Devices
One of Lightroom CC's best features is automatic sync. Once you import a preset:
- It appears on all your devices within minutes
- Any preset groups/folders you create also sync
- Edits made with presets sync across all your devices
Troubleshooting
Preset not syncing to mobile?
- Ensure you're signed into the same Adobe account on all devices
- Check your internet connection
- Try closing and reopening Lightroom on mobile
- Look for a sync icon in the app; it should show activity when syncing
Can't find the Presets panel?
On desktop, click the Presets icon or press Shift+P. On mobile, open a photo and swipe through the tools at the bottom to find Presets.
Related Guides
- Installing in Lightroom Classic: For the desktop-only version
- Installing in Photoshop ACR: For Adobe Camera Raw
- Tweaking & Customizing Presets: Adjust presets for your photos
- Managing Your Presets: Keep your library organized